Slide
Start Your Free Trial
New Member

Start Your Free Trial

LOGIN

New Member

REGISTER NOW

Enhance Your Brand with Skilled 3D Puff Logo Digitising for Textured and Dynamic Embroidery Designs

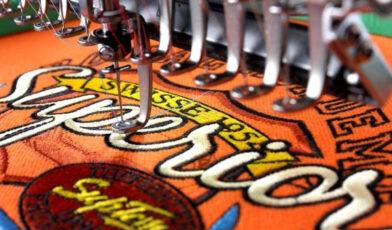
The process of employing foam to create 3D embroidery designs on headwear is called 3D Puff Digitizing, sometimes referred to as puff embroidery or foam embroidery. Regular embroidery digitizing and 3D puff digitizing are two very separate processes. This is because, unlike with cloth and thread, you are working with real foam. Since 3D puff logo digitizing offers your design a three-dimensional appearance, it must be developed in multiple steps and using certain methods and strategies.

Expert 3D puff logo Digitizing Embroidery Techniques 

Suggested foam thickness ranges from 2mm to 3mm and can be easily found at arts and crafts stores, offering affordability. Available in various colors and sizes, ensure the chosen foam color complements the shade used in the 3D portion of the design.

Material needs for 3D/Puff hat embroidery

  • Hat
  • 3D foam (2mm -3mm)
  • Scissor (To cut the foam)
  • Tape (Use to stick foam on hat)
  • Heat gun (to burn off some left off pieces)

Promote Your Brand with Professional 3D Puff Logo Digitizing

In the process of digitizing a 3D puff design, thorough design evaluation is crucial. Not all designs are suitable for 3D digitization, requiring careful consideration before starting. The stitching sequence is vital for 3D embroidery, beginning with the underlay, followed by the border. The 3D elements are deferred until the end due to their complexity.

After completing the border, foam is inserted into the 3D stitch area, secured with strips of tape. To ensure foam stability, tape edges are covered with material, and it’s essential to cut the foam slightly larger to prevent the needle from piercing the holding tape. Subsequently, a tack-down stitch is executed, followed by the integral satin stitch in 3D embroidery.

Tips:

  • Satin Path Stitches are the only way to do Puff. You can’t do puff embroidery with fill stitch.
  • Make your stitches at least 25% wider. You may achieve this via pull compensation
  • The Open Ends of satin stitch must be capped 
  • Run stitch or border stitch should be use around the border which helps to cut the foam.
  • Increase density if required to get better result sometime you need up to 75%.
  • You may also need to loosen your top thread tension a small amount when sewing the Puff embroidery.
  • Satin stitch area must be under 12 mm 

Existing Customer

New Customer

How to Order 3D Puff Logo Digitizing & Vector Art Service

1st Step
2nd Step
3rd Step
4th Step
5th Step

Register and Login:

  • Register your account. Click here to register.
  • You will receive your account details via email.
  • Login into your account. Click here to login.

Artwork and Instructions:

  • Upload your artwork.
  • Provide required details and instructions.
  • Mark your order as an urgent or normal

You Order is Under Process:

  • 12-24 hours (Normal order)
  • 3-12 Hours (Urgent order)
  • You may inform us if you required any minor modification like colors change etc.

Review Final Work:

  • You may review your work now
  • Approve your design
  • We will send for quality assurance

Invoice and Payment:

  • After you satisfy with our work you will get your order invoice via email.
  • You can pay us via PayPal, Credit Card or Bank Cheque.
  • You can also pay us monthly basis.

Our Digitizing Artwork

Open chat
Hello
How Can We Help You